Targets are physical objects that you set up on site that scanning software uses to tie together multiple scans. The process of tying together scans is called “registration.” If you have set up your targets correctly, the software will be able to register your scans together with relative ease. However, if targets are placed improperly, a lot of manual registration will be required. Manual registration is incredibly time consuming, and it is absolutely worth it to take extra time in the field to properly set up targets.
The Basics
Targets come in a variety of forms. The two major categories are targets that are (a) physical objects such spheres and (b) paper targets with a recognizable pattern printed on them. You can see examples of both to the right. Physical targets are significantly more expensive than paper targets which can be printed on an office printer. Physical objects are, however, frequently faster to set up and tear down. Furthermore, since they are a 3D object you have to worry less about the angle at which you are shooting them (this will be covered later).
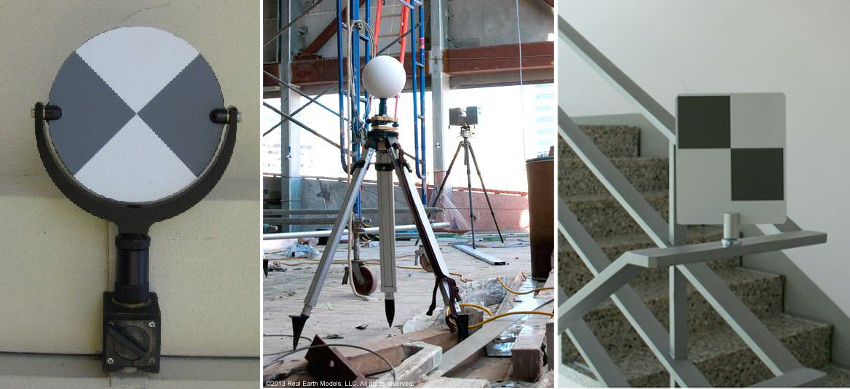
The above images are of a few different types of targets that are used in 3d laser scanning.
Setting Up Targets
When setting up targets, you need to keep in mind that 3 targets minimum are required to register two scans together. This means each consecutive scan needs to have 3 targets in common with the previous scan. Up to five targets are recommended as a safety net; however having too many targets is time consuming to set up and will take the registration software more time to process.
When setting up targets, take the following factors into account. Be aware that they will change per manufacturer.
- Resolution: The resolution your scanner is set to will affect how far you can place your target. For example, for a FARO scanner, at 1/4 in, the target can be up to 60 feet from the scanner; at 1/8th in it can be up to 30ft away.
- Distance: As mentioned above, targets can only be so far away from the scanner and still provide accurate registration. Keep in mind that what are listed above are maximums and could be significantly less, for example, there is a lot of dust and moisture in the space.
- Environment: Factors such as sun, dust and moisture can have an effect on how accurately targets are captured.
- Size of target: Smaller targets must be placed closer to the scanner. Targets will typically come with instructions about distances from the scanner.
- Any vibration: If you are in a room with vibration or very heavy air flow, such as a mechanical space, be aware that your targets may move and take extra precautions to secure them.
Do’s and Dont’s
Below is a list of best practices for setting up your targets:
- In the planning stage, create a floor plan with 60 or 30 foot radius circles around each scan location (depending on your resolution). Where the circles overlap is where your targets should go. Ensure that you are taking into account lines of sight and objects that may be blocking part of the radius of the scanner.
- Leave the targets from your very first scan up and make sure your very last scan captures them. This allows any error that has built up throughout the building to be spread over the size of the whole building instead of gradually getting worse and worse with every consecutive scan.
- Avoid arrangements or targets that are evenly spaced. For example, a square arrangement is very undesirable because during registration, there are multiple ways to match together a square arrangement. Straight lines are another arrangement to avoid for the same reason. Uneven, asymmetrical arrangements that can only be matched one way are what you’re going for.
- Don’t place paper targets at the same height or in similar configurations. If you have the same configuration in multiple rooms, the registration software may match these targets together incorrectly. Again, you’re going to lack of symmetry and greater randomness.
- Place targets as far away from each other as you can. A distance of 3 ft or greater is required, and larger distances are recommended.
- Don’t place targets on movable objects such as chairs. You never know who’s going to walk by and nudge these things.
- Attempt to face the paper targets perpendicular to the scanner. If the paper target is at too sharp of an angle to the scanner, the registration software may not recognize the target.
- Educate the individuals that are in the space about what you’re doing. Otherwise someone will come and nudge your targets around out of curiosity, especially the spheres. It happens every time.