Sequoia is an auto extraction program, by the company Thinkbox Software, that automatically extracts geometry from a point cloud data. In this post, I will outline the workflow for meshing point clouds in Sequoia and then exporting these meshes for use in Revit. I will also review the benefits and limitations of different meshing techniques. I hope you find it informative as well as interesting!
Loading in Point Clouds
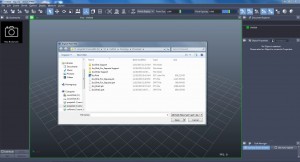
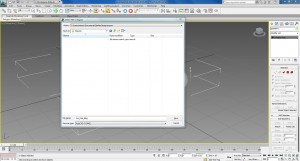
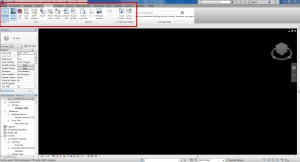
After opening Sequoia, the first step is loading in your point cloud(s). This is achieved by creating a point cloud loader. This can be done by either clicking the point loader icon on the toolbar at the top of the viewport window, or from the Create menu (see image below). Hover over the different icons in the toolbar with your pointer to get more detailed descriptions of each icon. An open dialogue box should immediately pop up and you can choose your point cloud to load from there.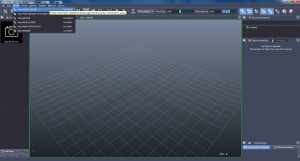
Usable Point Cloud Formats
Point clouds need to be one of these file types in order to be loaded and converted in Sequoia:
- prt
- sprt
- las
- e57
- ptg
- pts
- ptx
- xyz
- csv
- txt
- bin
- rpc
If the point cloud or point clouds aren’t one of those files (at the writing of this blog post) then they will not import into Sequoia.
If you’re exporting from Autodesk ReCap you may export it as either a .pts file or .e57 file. I’ve found so far that the .pts file seems to work the best out of the two. Also I would recommend importing a single, consolidated point cloud versus multiple point clouds that make up an area. Having one point cloud object seems to streamline the auto extraction process, as well as eliminate mesh overlap in the final product. While you can extract the individual point cloud scan separately it is more efficient to have them in one file unless you are extracting a very large point cloud.
Converting Point Clouds to Sequoia Native Format
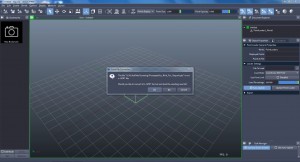
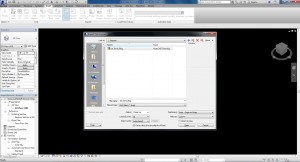
Sequoia will have to convert the point cloud into a file format that it can read so a dialogue box will pop up and ask you to convert it into a .sprt file, click yes and then ok. This will take a while depending on the size of the .pts file that you have. We experimented with data samples between 150 MB and 1.5 GB. The 150 MB file size took about a minute to convert, while the 1.5 GB file took a little over 10 minutes.
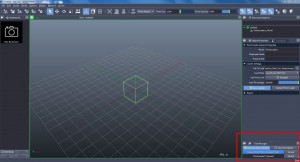
Note that there is a task manager in Sequoia and it is located at the very bottom right of the screen. The task manager shows what tasks are being completed. It will display single loading bar or multiple loading bars for multiple tasks. It may appear like nothing is happening, but there is a faint diagonal line pattern that shows up in the bar as Sequoia converts the point cloud. The conversion process can run in the background of your machine has multiple processors. However, do not attempt to do anything else in Sequoia while this is happening.
Applying the Mesh
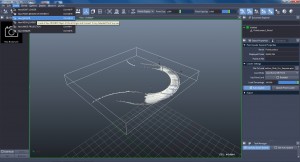
Once the point cloud is loaded and converted it is time to apply the mesh! In order to do this you add a mesher object which can either be done from the toolbar or the Create menu on the menu bar. When you add the mesher it doesn’t automatically start meshing – you must apply certain criteria for it to start.
First, choose which meshing method to use. In the Object Properties box there is an Advanced Meshing dropdown menu. Click the arrow on the menu title to open it. Within the Advanced Meshing menu the Method of Meshing is the top field. There there there are four different types of meshing:
- Zhu/Bridson (Default)
- Metaballs
- Union of Spheres
- Anisotropic
I will go into detail on the pros and cons of each meshing method later. For now use the default Zhu/Bridson setting.

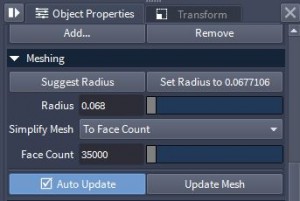
Then we need to set the radius of the geometry that will be extracted from each point of the point cloud. The radius is set in the Meshing dropdown menu under Object Properties. You can either suggest a radius or use the default radius that Sequoia generates for you. The recommended radius worked well as a ballpark number for our test projects, although some small tweaks were necessary to get optimal results. Apply the radius by clicking the “Set Radius To…” button in the Meshing dropdown menu.
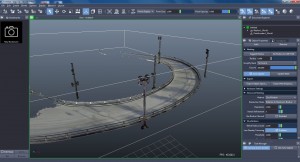
You are now ready to apply the mesh to the point cloud. To do so you need to press the Update Mesh button in the Meshing Dropdown menu in the Object Properties box. Even though Auto Update is checked by default it doesn’t seem to update the mesh in real time so to update the mesh you need to click “Update Mesh.” The meshing process will take some time, depending on the size and detail of the point cloud. For the projects we tested it took approximately the same amount of time as the conversion process to the .SPRT file type – the 150 MB file size took about a minute, while the 1.5 GB file took a little over 10 minutes. Remember to watch the Task Manager in the far lower right of your screen for progress on the meshing task.
Refining Your Mesh
When the process finishes, look at the extracted mesh and if it’s accurate to what you want you can move on. If not adjust the radius by either using the slider next to the Radius field in the Meshing drop down menu or by simply typing in the number you would like. Do this until you get the desired result. You can also adjust how many faces you would like to have on the mesh in Sequoia and you can do this in two ways.
In the Meshing menu there is a drop down field labeled “Simplify Mesh.” Within this field there are the options “To Face %” and “To Face Count.” With “To Face %” you can decrease the number of faces in the mesh by a percentage. With “To Face Count” you set a maximum number of faces for the mesh to have. The “To Face %” option is useful if you are trying to determine by what percentage you can simplify a mesh by before it stops looking like the object(s) you are attempting to mesh. This is useful if you don’t have a hard maximum number of faces that your final mesh can have. The “To Face Count” option is useful if you know you have a set face count limitation. For example, Revit will only accept objects with a maximum of 35,000 faces. Therefore, you would use the “To Face Count” option to simplify your mesh for a Revit export.
Exporting the Mesh
Once you have the mesh to your liking or to project specifications you can export it. The file types that Sequoia allows you to export to are these:
- xmesh
- obj
- ply
- stl
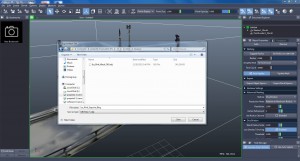
In order to export you can go to the File menu in the menu bar at the top of your screen, or within the object properties area click the Export dropdown menu. You get two choices on what to export – (1) Export Scene Space or (2) Export World Space. Use Export Scene Space – this will export only your mesh geometry and not any additional point cloud or coordinate data.
Revit Import
If you are going to import into Revit you have to do a few things for Revit to accept it. As mentioned, the mesh cannot be larger than 35,000 polygons or faces. Revit treats each individual face as an object and Revit cannot support that many objects in one mesh. Try to keep the mesh between 30,000 and 34,000 polygons.
First you must export the mesh to 3DS Max by exporting the mesh as either a .obj file or .stl file. This may take some time depending on the size of the mesh. Once exported, you import the mesh into 3DS Max by opening 3DS Max and then clicking the 3DS Max button and then clicking the Import button. The import window will pop up and then you either choose the .obj file extension to import or .stl. Choose the file you want to import and then click the import button. Save the file for future exporting or for a future project.

To export from 3DS Max to Revit click the 3DS Max button in the upper right corner of your screen and then click the Export button. The export window will pop up and for the mesh to import into Revit it must be either a .dwg or .dxf file. The .dwg seems to work the best and that’s the one I generally use. Choose which one you would like and then click Export, this may take a while. In order to import the mesh to Revit, open Revit and either make a new project or open an existing project you would like to load the mesh into. Go to the Insert tab on the toolbar and click the Import CAD button. Select either the .dwg or .dxf file you exported from 3ds Max and load it in.
Congratulations, you have successfully loaded a whole mesh into Revit!
More on Meshing Methods
I’d like to expound on the different types of Meshing Methods available in Sequoia. The different meshing methods will give you different levels of smoothness to your mesh as well as effect the resource economy of your mesh.
Zhu/Bridson
The default meshing method is the Zhu/Bridson method. This method was originally created to simulate sand, it creates smoother surfaces by making an iso-surface; this method gives a middle smooth smoothing result.
Metaballs
Next in the middle smooth methods is Metaballs. This method creates a sphere for each point in the point cloud and connects each sphere to create an iso-surface that is similar to a mesh made in 3DS Max or other similar programs.
Union of Spheres
The least smooth way to mesh the point cloud is to use the Union of Shperes Method. This method makes each point it’s own sphere and if the points happen to be close enough they will connect but with no smoothing.

Anisotropic
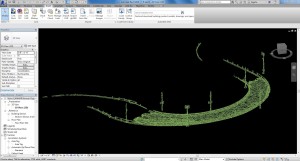
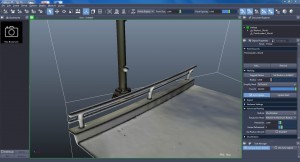
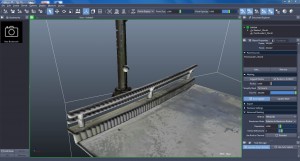
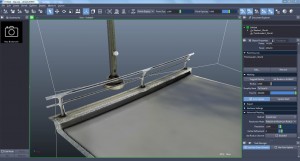
The most smooth meshing method is the Anisotropic method it makes an iso-surface by making each point a particle and stretching them across the different points. This makes your mesh extremely smooth but it takes the longest to mesh and is the most resource heavy method. In our sample project pictured here the Anisotropic method took the longest, a factor of 10, a hugely significant margin.
When you lower the amount of polygons on a mesh in Sequoia or 3DS Max there is no way to optimize it in such a way where it’s guaranteed that the mesh will optimize to the original shape extracted, so having a good idea of the limitations of either Revit or 3DS Max or whatever program or function you’re utilizing the mesh for is a must.
I’ve also found that if you plan ahead on how extensive your point cloud is before bringing it into Sequoia (as in trimming out any extemporaneous parts of the point cloud or keeping your scans to a specific area) definitely helps with the accuracy of the mesh and will make more efficient use of computer resources and more accurate polygon distribution on the mesh. You can trim down your point cloud in Autodesk ReCap if that’s the program you’re using to compile the point clouds.
I hope this post has been helpful in some way regarding an understanding of Sequoia. I also hope that you have a better understanding of what you can utilize Sequoia for and how it can affect your modeling and visualization.
Nice tutorial and Sequoia looks like a great meshing tool! Just interested to know what you are using meshes for in Revit? In our experience the mesh is pretty unusable. Are you able to convert to a usable topo surface or do you use it to remodel from?
Would love to more about your workflow!
Great post Max! Nicely documented.